Tuesday 30 April 2013

Soft Chocolate Orange Cookies


I've signed up for a night time 10km run. I don't really know why (it could be the fault of The Thew who is a superman of athletic endeavour and may have inspired me). I saw it advertised in the cafe in my local park on Sunday morning and was curious about it. Then I had some time to kill that afternoon while waiting for a train and instead of just browsing the site I bunged my name and cold hard cash down. I do get a complimentary t-shirt but as it’s a Nike run I'd bloody well hope so. It's more like I bought a t-shirt and got a 10km run thrown in. 

Anyway I was starting to come to terms with it when I saw that running is the new clubbing on the Guardian online. This run has a light show, music and a party afterwards. This has slightly depressed me. I stopped spinning when it struck me that it seemed to be where people go when they realise they'll never go clubbing again but still want to listen to house and dance music. Not that I go clubbing anymore but I don't want to think I've given up hope of one day being in a club trashing about to hard house. Therefore I just have it on my iPod and go running - not much better but somehow it doesn’t feel as bad to me. I'm now concerned about this night time 10km, as it might be dangerously grown up and a bit sad. 

I'm going to go ahead with it as one of the reasons I love living in London is all the random stuff that goes on which I think I should take advantage of. It does mean I don't have long to train, as its in less than four weeks, so I'm going to cut out crap food until I do the run. So this week I've baked two things that aimed to use up all the chocolate I have in my home. This is the first of them. As I don't fancy running 10km with an entire chocolate orange weighing me down (left over from Easter) I've made up a soft chocolate orange cookie. They're pretty good so give them a go. It doesn't need to be a chocolate orange on the top just whack a huge hunk of any chocolate on top that you happen to have. 

Ingredients 

200g butter
100g soft brown sugar (I used light as I didn't have dark but I think that would work well)
200g caster sugar
1 large egg
75g cocoa powder
275g self-raising flour
50-100ml milk
1 chocolate orange (this recipe leaves you 4 pieces to sustain you while you bake) or 16 chunks of chocolate 

1.    Preheat the oven to 220°C/GM7.
2.    Cream together the butter with both sugars. Then mix in the egg.
3.    Sift the cocoa into the bowl and add the flour. It's best to mix with a spoon as it’s a dense dough. If you need it add some milk but make sure you mix the dry ingredients in well first as you don't want the dough too wet.
4.    Once it’s come together divide the mixture into 16 balls and place on a baking sheet. Leave a lot of room so you'll need two trays or do in two batches. Then smush a slice of chocolate orange, or a chunk of chocolate, into the top of the dough flattening it out a bit.
5.    Bake for 10 minutes at the top of the oven and let cool as they will be delicate when first out.
6.    Run 10km wearing your 'complimentary' t-shirt.

Wednesday 24 April 2013

Multi-coloured Sponge Cake with Double Frosting

Thanks to Barty for the photo as I forgot my phone!

A sense of relief has occurred. I feel like all the emotions of the year culminated during last week, crescendoing around the weekend and dissipated while eating Chinese on Sunday night. I shan't bore you with the details as most is referenced in other blog posts but two massive events are over that I now realise I expended a lot of my mental reserve on. When you're in it you don't really feel it, however once it’s gone you are struck by a feeling of lightness and calm.

Actually I'm more knackered than anything else but nothing some sleep won't fix. I managed to feel good enough to give blood on Monday morning (which I think everyone who is able should do http://www.blood.co.uk/) as I'm part of a study on the frequency of donation so need to stick to a schedule. I love how after donating there is an excuse to eat crisps before 9am - "I probably need salt" - and that I can leave with a snack pack of biscuits to 'sustain' me for the ten minute walk to the office. Anyway all this left me stuck for something to bake this Monday and fairly bored with the whole idea of doing anything other than sitting when I got home. 

Then, while looking for ideas around a Thai chicken sausage roll that I'd discussed with my desk at work, I found the gem of an idea take shape. Nothing to do with chicken but all to do with multi-coloured cakes. I have no idea of the connection and can only put it down to tiredness, randomness and other such things that occur when your brain unwinds. So here is a multi-coloured layer cake with double chocolate frosting. I completely cheated and bought the chocolate fudge frosting (and would have bought vanilla to sandwich it but it wasn't in the shop). You can make your own but I think that when this much food colouring goes into a cake you may as well just say to hell with it and get dirty (in a good way) pre made frosting.

Ingredients

400g butter (bring to room temperature as it will be a nightmare to mix otherwise)
400g sugar
8 large eggs
400g self-raising flour
Food colouring - I had red, blue, yellow and green liquid which didn’t come out as vivid as I would like. I’d suggest gels or pastes but will try them out and report back.
1 tub chocolate fudge frosting
1 tub vanilla frosting (I made one which can be foundhere as I had the ingredients at home but I'm going to be honest and admit I didn't weight anything out. Just guessed and went on taste!)

1.    Preheat the oven to 180°C/GM 4 and butter and line two sandwich tins. I think it’s always worth lining sandwich tins as it makes getting the cakes out so much easier.
2.    Cream together the butter and sugar and then add the eggs two at a time. The mixture will curdle as I’ve never made one that doesn’t but it never seems to matter. Some people get every concerned about it but I think stuff it.
3.    Then fold in the flour. I know it will be tempting to just mix (and I normally would) but as you need to mix in the food colouring you need to respect the air in the mixture a little bit. The batter will be thick so never fear.
4.    Then divide the mixture up into as many bowls as food colours you have. Add an amount – start small and add more if you need – and mix in. You’ll need to be bold with it and I used about a tbsp for each of my four bowls.
5.    Add the individual coloured batter to the sandwich tins. I attempted rings of colour (see below – without piping bags because who has the time!) but you can just dollop it in. It’s a robust batter so it won’t spread that much.
6.    Bake for 35-40 minutes and then leave to cool. Or accelerate the cooling in the fridge once turned out, as I did, as I was tired and wanted to go to sleep.
7.    Then sandwich the two cakes together with the vanilla and cover with the chocolate. You could sandwich them with jam and then cover with buttercream if you prefer. Really whatever if easiest. Done.
 
Tip: when frosting a cake you normally do it on the plate or board that you serve on. As it can go everywhere slip thick slips of baking paper around the bottom of the cake, once on the board, and frost away. Once done carefully remove the strips of paper and you’ll get a clean finish.

Thursday 18 April 2013

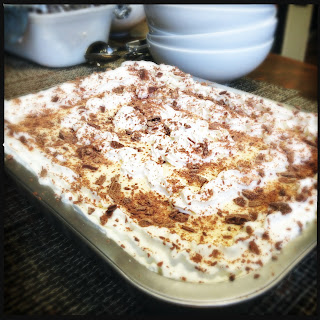
Work Trifle


Not really baking but exciting none the less. A company came to present to us at work and left us a Swiss roll (it had some vital symbolic importance to the meeting which was lost on me as I wasn’t in it). I casually mentioned that you could make trifle with it and the plan went from there. All you need for trifle is the basic ingredients, hot water and a fridge so you can make it at work!

It’s not the best trifle in the world but with a bit of practise I think making trifle at work could seriously kick off.

Ingredients

Swiss roll
Jelly – we did two layers but you don’t need to
Fruit – if you have it. My work is nice and we get it for free.
Custard – ready made of course
Whipped cream – from a can
Flake

1.    Cut the Swiss roll up and put a layer of it in the bottom of your container. See what you have around the office to use. Chuck some fruit on top.
2.    Make the jelly as per instructions and pour jelly over the Swiss roll (and fruit). Let it set. I think that strawberry is best for this layer as it works well with cake.
3.    Now we added another layer of jelly at this point but you don’t have to. If I do it again like this I’d put the fruit in this layer. If you do pour on top, making sure the mixture if fairly cold so it doesn’t melt the first layer, and let set.
4.    Put custard on the top and let it set a bit (we didn’t as we wanted to eat it but probably worth it).
5.    Decorate with squirty cream and flake.


Tuesday 16 April 2013

Snickerdoodles


Life is sometimes like a movie. Not often but enough to remind you that some moments are truly amazing and what may seem contrived isn’t. Now if you have a movie life moment it’s going to be good. If you have a film moment it could be good and it could be bad but it won’t be a ‘movie’ moment. Apologies for the weird distinction between the two that exists in my head. A movie moment is a bit slushy and if it’s happening in the UK it’s a Richard Curtis film.  

I had one of these this Monday. I didn’t go to work but instead went to Gatwick airport to meet The Thew’s after he flew back from doing the Marathon des Sables. When I arrived I saw a couple of people with balloons saying ‘Well Done’ and a child walking around with a homemade sign. I wondered if they were meeting someone from the MdS but wasn’t sure. I positioned myself in front of the arrival doors and over the course of the next twenty minutes found myself in an ever increasing crowd of people who were meeting people off the same plane. More children arrived with banners, more adults arrived with balloons and suddenly everyone was talking about how excited they were to see their loved one again and congratulate them on their amazing achievement on running 150 miles across the Sahara. I never talk to strangers in London but found myself sharing the highs and lows of having someone take on this race. Nervous energy kicked in while we waited and we started cheering randoms who pretended we were there for them. As people started coming through wearing MdS t-shirts we collectively started clapping and cheering. Small children flung themselves as their dads arriving and tears started to flow. It was exactly like ‘Love Actually’ and it was glorious. A movie moment.  

These are the baking equivalent of the movie moment. They are easy to make, I’d say fairly impossible to get wrong, fill the house with a wholesome baking smell and are always good. Any American who sees them says ‘Wow, Snickerdoodles’ while anyone else asks how Snickers bars come into it. They don’t. I've given a method that means you should be able to use one bowl, just measuring the ingredients in as you go along. The nearest I can describe them in taste is a biscuit version of a doughnut.  

Ingredients

125g butter
100g caster sugar plus an extra 2 tbsp
1 large egg
1 tsp vanilla extract
250g plain flour (or 225g plain flour and 25g sifted cocoa powder)
1/2 tsp salt
1/2 tsp grated nutmeg
3/4 tsp baking powder
1 tbsp ground cinnamon 

1.    Preheat the oven to 180°C/GM 4.
2.    Measure out and cream together the butter and 100g sugar. Ideally the butter should be at room temperature but if not then just whizz the butter on its own until a little more pliable.
3.    Add the egg and vanilla extract to the bowl and mix in.
4.    Then measure the dry ingredients into the bowl and mix well. It won't seem to come together for a while but keep at it. If you're using an electric whisk you'll need to get your hands in to bring it together once it looks like large breadcrumbs. If you want to make the chocolate version then use the flour and cocoa powder version.
5.    Once you have a dough, divide into 32 pieces (I divide the mixture into four even pieces as each of those make 8 and it makes it easier to keep them the same size) and roll into balls. Mix the 2 tbsp caster sugar and cinnamon together and roll the balls into it so they are covered.
6.    Place the balls in a baking tray with a gap between then as they spread a little. You'll probably need two trays or cook in two batches. Then bake for 15 minutes.
7.    Cool and eat. They keep for quite a while in an air tight container and I find they make a lovely gift in a jar.


Tuesday 9 April 2013

Daisy Cake Pops


The Thew is currently running across the Sahara so I'm at a bit of a loose end. I do like having my own space but when I'm doing nothing I have realised that I like to have someone to do nothing with. As Carrie Fisher says about couples in 'When Harry met Sally' - "You had a date on national holidays." I suppose I miss having The Thew around to just hang out with and randomly bug. Maybe that's how you know you've found the person you want to marry. You've found the person you just want to hang out with above and beyond anyone else.
 
Currently The Thew is making me think he misheard the marriage vows and thought it was 'in fitness and in health'. My respect for couples who had to be apart before modern communication has jumped up measurable (alongside my respect for couples who have to be apart these days). The Thew is in the middle of the desert with no phone but I can track his progress online via the chip in his shoe and watch him finish a stage of the race via a webcam. He can get messages of support printed out and given to him so he knows people are cheering him on. Just amazing.  How couples coped when they were separated for months without any form of communication is beyond me. Anyway I’m just a little bored (and obviously very proud and excited about The Thew doing well on his run) so baking was a good distraction this week.
 
I'm stretching the word 'baking' with this one as there is no baking involved. However there is some cake and chocolate melting so it’s part of the way there. Lots of cake pop tins have started to appear everywhere but they seem like a pain to use. Therefore this one just mushes together some stuff to create the same sort of thing. Cake pops give you the perfect opportunity to raid the home baking section of the supermarket for all those wonderful glittery and sprinkly bits that make baking fun so bonus! I'd say this is the perfect recipe to do with kids as its easy, a bit messy and involves lots of colourful decorations. I was a little concerned about how you keep them upright but solved it by getting a flower oasis and sticking them in that. I think most florists do them and mine only cost a £1. Yay!
 
Ingredients
Pops
200g pre made Maderia cake
150g dark chocolate
100g white chocolate drops
Decoration
150g white chocolate
24 lollipop sticks
Sprinkles
24 edible daisies (I used Dr. Oetker ones as they were cheap and I decided to forget the episode with the red food colouring that ruined by Red Velvet Cupcakes)
 
1.    Melt the dark chocolate by your preferred method. I don't have a microwave so I have to use the old bowl over boiling water way.
2.    Whizz up the cake into crumbs in a food processor and add to the melted dark chocolate. Let it cool a bit and then mix in the white chocolate drops.
3.    Make 24 round ‘pop tops’ out of mixture, putting them on a plate and chilling them in the fridge for 20 minutes or so.
4.    Melt the white chocolate and dip in the top of each of the lollipop sticks before pushing into each of the pops. Then let this set as it ensures that the two stay attached during the next stage.
5.    Dip each pop into the white chocolate until thickly covered. Then spin the pop around upside down to get the excess chocolate off. Repeat again before dipping one side into sprinkles (an egg cup works best for keeping the sprinkles), standing upright by your preferred method and sticking a daisy on. Then let everything set.

If you can’t get a flower oasis then a glass with sugar in can work or maybe get a paper bowl, turn upside down and punch holes in the top.

Sunday 7 April 2013

Breast Feeding Bread


As a rule I try to turn up to houses with a baked good so I hunted around for something before visiting my friend and her baby boy. I found a recipe for Breast Feeding Bread in a Leon cook book The Thew gave me and thought I'd bake that (although it turns out she isn't breast feeding as aforementioned baby boy didn't cooperate but she hangs out with people who are more than me). I'm hoping it tastes ok as it has aniseed-y type seeds in it which aren't always people's cup of tea. Although there aren't tons in there so I guess toasted with enough jam will make it taste ok.
 
I couldn't get all the ingredients but I don't think it matters. It basically includes four milk enhancing seeds so replace the aniseeds, fennel, fenugreek and caraway with some sesame seeds etc for people who don't want to start spontaneously lactating (although I'm pretty sure it doesn't work like that, being brought up in the Catholic religion where you're told that the stigmata can spontaneously appear on you makes you wary and therefore take ridiculous precautions you don't need to).
 
Ingredients
 
Bread
Soft butter
330g strong wholemeal flour (it said wholemeal spelt flour but as I couldn't even find it in Holland & Barrett I decided it could go hang)
170g strong white flour
5g easy dried yeast
2 tps crushed sea salt (personally I wouldn't substitute for table salt but if that's all you have then maybe go easy in it)
1 tsp aniseeds (I couldn't find these anywhere!)
1 tsp fennel seeds
1 tsp caraway seeds
1 tsp ground fenugreek seeds (if you have a coffee grinder use that as I did it in my pastel and mortar which, while giving me no end of joy whenever I get to use it, did mean the seeds shot off everywhere)
40g pumpkin seeds
40g sunflower seeds
2 1/2 tbsp olive oil
300ml warm water
 
Topping
15g pumpkin seeds
15g sunflower seeds
40g pine nuts (maybe my dough wasn't sticky enough but this just sat on top and burnt then fell off so you could ignore these)
1.    Put all the dry ingredients for the bread in a bowl. Mix well.
2.    Add the oil and water and mix through. Then knead until smooth in the bowl- I used dough hooks on my electric whisk. It should still be wet and I think mine was too dry so add more water if it doesn't look sticky.
3.    Grease a 1kg loaf tin (a smallish one as I'm never sure of sizes) and put the dough in it. Then cut deep gashes on the stop (about four) and stuff with the topping seeds. Sprinkle all over with pine nuts and press into what is hopefully a sticky dough.
4.    Place the tin in a large plastic bag that allows a lot of room. I used a bag for life. Tuck in the ends so its sealed and leave in a warm place to double in size. About 2 hours.
5.    Preheat an oven to 230°C/GM 8. Bake for 20 minutes and then turn down to 200°C/GM 6 for another 20 minutes. Then take out, cool and turn out.

Tuesday 2 April 2013

Meringues


A quarter of the year has gone. Where I don't know but it has. It never helps that at work I'm always planning months in advance with clients or working on projects with a live date about two months in the future. To be honest I'm just surprised it isn't Christmas already and thankful that there is still some of the year left. The clocks going forward and ‘summertime’ starting always seems like a kick up the arse with the year telling you to get on with everything as you can’t pretend its January anymore.

So I’ve decided to bake something I have never done before, using techniques I don’t particularly like but as baker should be able to do. I had some egg whites left in the fridge after the bread and butter pudding (as many yolks were needed) so meringues it is. I intend to make them everytime I have left over egg whites but never quite get around to it. I always think that they look great when I see them in shops and I thought – yep, I want to look that impressive. They are a show piece, especially if you make them a bit big. Ideally you use a piping bag to make them, which along with delicate icing, is not something I like to use. I get really messy as whatever I'm piping squirts everywhere. You can use a spoon but I thought I should get my piping skills up. It did mean hunting around for the stupid nozzles for my piping bag as I had no idea where I put them, however this little exercise unearthed some things I’d forgotten about so it was probably worth it.

Ingredients 

4 egg whites
Pinch of salt
115g caster sugar (I only had golden so that us why they aren't crisp white in colour)
115g icing sugar
1 heaped tsp cornflour
Food colouring (optional) 

1.    Preheat the oven to 140°C/GM 1.
2.    Lightly grease with oil a baking tray - I used rapeseed but just make sure it doesn't have an flavour.
3.    Put the egg whites and salt in a ridiculously clean bowl. I'm sure all your bowls are clean but one whiff of oil and you won't get the egg whites to fluff up. They are stupidly stubborn about that kind of thing. Anyway whisk the hell out of them until they form soft peaks.
4.    Then whisk in the sugar a tbsp at a time until you have a bowl of shiny egg whites that keep stiff peaks in them.
5.    Sift the cornflour and about a third of the icing sugar over the top. Then fold in with a metal spoon. Sift the rest of the icing sugar on top and then fold in.
6.    Now just take a heaped tablespoon of the egg white and put it on the baking tray. You'll probably need two, or do in two lots, as this makes about 15.
7.    Optional bit - put a drop of food colouring liquid or gel on the top and use a skewer, sharp end of a knife, toothpick to swirl it around.
8.    Put in the oven for about 50 minutes. I have a gas oven so I turn the tray midway through as the back ones will get done quicker. Once done switch off the oven, keep the door on the latch and let the meringues cool as the oven cools - about 30 minutes. Then you're done!

You can obviously serve these with cream or just on their own. The idea is that the outside is crunchy and the middle is sticky. After making these I did realise that I find the texture of the outside a bit weird on my teeth, like biting into cotton wool but that’s just me. I’m actually grimacing while writing this as it freaks me out but I eat them anyway as I like the middle bit!

Monday 1 April 2013

Bread and Butter Pudding with Hot Cross Buns


I've never made bread and butter pudding but thought that an Easter twist on it would be a nice dessert when The Thew’s family came around on Easter Sunday. I would recommend buying the hot cross buns as you want ones that are fairly robust to absorb the custard.
 
Ingredients
8 hot cross buns
Butter
450ml double cream
450ml full fat milk
4 egg yolks
1 full egg
Nutmeg
1 tsp vanilla extract
3 tbsp caster sugar
Sultanas
Zest of an orange
Demerara sugar to top
1.    Preheat the oven to 160°C/GM 3.
2.    Slice the buns in half and spread with butter. Then arrange them in a dish slightly overlapping.
3.    Sprinkle with some sultanas and orange zest. I didn't weigh the sultanas as it was just a scattering to boost the fruit content.
4.    To make the custard heat the cream and milk together in a pan to just below boiling point.
5.    While that is going on whisk the egg yolks and egg together with the caster sugar. Then add the vanilla extract and a grating of nutmeg.
6.    Once the milk is hot pour into the egg mixture while constantly whisking. It will be a thin custard so don't panic that it’s not thick. Then pour the custard over the buns and leave for 20 minutes or so to soak in.
7.    Sprinkle Demerara sugar over the top and pop into the oven for 45 minutes.
8.    Serve with more custard!