Showing posts with label biscuits. Show all posts

Friday, 13 November 2015

Vegan Snickerdoodles


This came about as I was in experimentation phase and due to stay at friends – one of whom is vegan. I don’t like to arrive somewhere empty handed so the hunt was on for some vegan baked goods. I couldn’t be bothered to hunt through my old copies of Jamie magazine to find the ‘vegan’ issue so just went free style on an old favourite.
 
This recipe needed substitutes for butter and egg. The butter is easy as coconut oil has a lot of the same qualities. The egg was harder as I’d never had to do it before. Plus I had thought that this recipe didn’t have egg in so it was initially a bit of a surprise. However help is only a google away. There are tons of suggestions but I went for vegetable oil as it seemed to promise to do what was needed.
 
The final products were very good. A bit more crumbly than regular ones, as I guess the egg does a binding job that the oil doesn’t, but they held their shape. I took them into work, my usual test for my baking, and everyone was very complimentary.
 
Ingredients
125g plain flour
¼ tsp grated nutmeg
½ tsp baking powder
¼ tsp salt
60g coconut oil
50g caster sugar + 1tbsp
30ml vegetable oil
½ tsp vanilla extract
1 heaped tsp ground cinnamon 
  1. Preheat the oven to 180°C/GM 4.
  2. Add the nutmeg, baking powder and salt to the flour and mix well.
  3. Whisk the coconut oil and 50g caster sugar together. You’re not going to be creaming it as much as you would with butter, but make sure you spend a couple of minutes doing it.
  4. Then add the vegetable oil and vanilla, mixing well, before adding the flour mixture. You’ll need to use your hands at the end to bring the dough together.
  5. On a plate mix the remaining sugar and cinnamon together.
  6. Then divide the dough into 16 balls. Just break the dough into quarters then each of the quarters into four. Roll into balls, then roll in the sugar and cinnamon mix to cover the outside completely.
  7. Pop on a baking tray and bake for 20 minutes. Let cool completely.

Monday, 19 January 2015

Gingerbread Biscuits


Before Christmas I went on an epic baking spree. My standard Porter Cake featured but I also made some gingerbread stars because a) gingerbread is super simple to make and b) I have some lovely star shaped cutters that my friend gave me. Stars are pretty much my favourite thing – second are fireworks and then balloons. However, enough about my love of fun things and on to the recipe.

Ingredients
250g butter
200g dark muscovado sugar (regular dark brown sugar can work)
4 tbsp golden syrup (buy the new squeeze bottle they do – it make it to easy)
4 tbsp maple syrup
600g plain flour
2tsp bicarb of soda
4 tsp ground ginger
2 tsp cinnamon
Zest and juice of 1 orange

  1. Preheat the oven to 200°C/GM6.
  2. Put the butter, sugar, golden and maple syrup into a saucepan and melt together. You want it to boil and then turn off the heat.
  3. In another bowl mix all the dry ingredients – flour, bicarb, spices and zest – and then stir in the butter mixture. If it’s too stiff then you can use some orange juice to bring it together.
  4. Lightly flour a surface and roll out the dough to about 5mm. Then start cutting. I used stars but any shape will work. Gingerbread hold their shape really well so suit being cut into shapes.
  5. Ideally put the shapes in the fridge for about 20 minutes before baking for 8-10 minutes. You want them to be going a little brown. They’ll harden outside of the oven as they cool.
  6. You can decorate these if you like but I tend to just want to eat them.


Thursday, 9 October 2014

Chocolate Malt Biscuits


A couple of weekends ago some good friends of mine got married. The night before one of the Bride's friends, who I met on the hen, stayed over at mine as we were decorating a boat together on the wedding day (I know - random). Anyway she brought many lovely gifts with her, one of which being a jar of caramel biscuit spread (the others alcohol based) which we had discussed in length on the hen do. It’s basically the caramel biscuits you sometimes get with tea or coffee in the little wrapper mushed up to make a spread. I know!!! 

She proceeded to reveal a packet of malted milk biscuits from her bag as these are the structure she had found best to spread this on. It was immense.  

So that got me thinking about malt and biscuits. I’m a fan of malt. I’ll have a malt shake over a pure milkshake but I’ve never been a fan of malt loaf or malt drinks. However the malted milk biscuits were good and so I investigated. I found a recipe and they worked out very well. I made 2 ½ times this amount as my work eat biscuits like the world is ending and I needed lots! 

Ingredients
150g plain flour
½ tsp baking powder
Pinch of salt
100g butter (soft)
75g granular sugar
60g Ovaltine
2 large egg yolks (you can whisk up the whites, add 120g caster sugar to make 2 large meringues. Bake on the lowest heat you have for about 1 hour, turn off the oven and leave to cool in the oven).
1/2 tsp vanilla extract

1.    Preheat the oven to 180°C/GM4.
2.    Combine the flour, baking powder and salt in a bowl. Leave to one side for the moment.
3.    Cream the butter and sugar together until it’s got pale. Everyone goes for this fluffy thing but unless you have a free standing whisk thing then about3 or 4 minutes will do.
4.    Then add the Ovaltine, egg yolks and vanilla. Mix well.
5.    Add the flour mixture and you’re done. You may need to use your hands to bring the mixture together as it will just look like wet sand.
6.    Then divide into 16 balls.
7.    Space them out on a baking tray – no more than 8 on a large cookie sheet – and press them down until they are about 1cm thick. Bake for 11 minutes. No more, no less!
8.    Cool and eat with a glass of milk.
 
Look - spread on biscuits!!! Oh and wine.
 

Wednesday, 13 August 2014

Bacon and Chocolate Chip Cookies (Primal/Gluten Free/Dairy Free)


Primal – sounds fairly basic and maybe a little bit cool huh? It’s apparently a diet. Not a ‘less not eat anything until we need to pass out and then have a small piece of cheese’ diet but one that looks at what we evolved to eat. Or something like that. It’s probably like the Paleo diet and the Caveman diet and anything else that basically doesn’t let you eat anything fun or anything that was invented in France – French bread, pastries, macaroons, croissants (some of these things may not have been invented in France but I can’t be bothered to research in this for the sake of this). 

I’m slightly suspicious of these kinds of restrictions on what you eat, mainly because it stops me eating chocolate and bread. The Thew follows a Paleo-esque diet. He eats an incredibly healthy diet so he can drink lots of alcohol and maintain fitness. Currently he is spending most evenings upside down in a handstand position against one of our walls. Hey – whatever works for you! 

My good friend Claire shared this recipe with me and, while I’m not sure about trying to recreate recipes using paleo/primal ingredients in place of good old butter and sugar, it was intriguing enough for me to give them a try. The original method I read is a bit lacking on details and the one thing you need to do with these kind of recipes is a good methodology if you have any hope in hell of making something that looks like the ‘real’ thing. Many people at work liked these, and they are ok, but I’d just rather eat a chocolate chip cookie made with brown sugar and wheat flour. I’m not sure what the bacon adds, other than a bit of salty taste, but I guess it’s to add protein. Anyway, if this is your thing, go knock yourself out! 

Ingredients

5 rashers of streaky bacon (I used M&S)
60ml of maple syrup (plus 125ml – see below)
2 large eggs
1 tsp vanilla extract
125ml coconut oil (make sure it’s fairly well melted so room temp or melt it first)
125ml maple syrup
1 tsp bicarb of soda
1 tsp salt
300g ground almonds
200g dark chocolate chips 

1.    Preheat the oven the 190°C/GM 5.
2.    Dip the bacon in the maple syrup and bake for about 25 minutes. It may need longer. Put them on foil to save mess. Turn half way through and ignore how burnt the foil gets from the run off maple syrup. Cool, ideally on fresh foil or greaseproof paper. They are very sticky! Chop into bits.
3.    Whisk the eggs, vanilla, coconut oil and 125ml maple syrup together in a bowl. You want to goof frothy mixture as the eggs will add air to the mixture and help keep them light.
4.    In a large bowl mix the bicarb, salt and almonds. Add the egg mixture and whisk together.
5.    Add the chocolate chips and bacon bits stirring to incorporate.
6.    The put heaped teaspoons of mixture on a baking tray, leaving space between them. Flatten them out with the back of a spoon or spatula so they resemble a cookie shape.
7.    Bake for 11-12 minutes – you want them turning golden brown. Cool completely before serving.

Makes about 30.

N.B. I made these afterwards without the bacon and they worked well. The bacon definitely gives a good savoury/salty edge but it's not necessary.
 

Wednesday, 5 February 2014

Alfajores


What is with all these celebrities writing open letters to each other? I get the idea behind them but it’s getting a bit boring. They have all this money and they resort to releasing the equivalent of a press release about someone else and their thoughts on them. It also seems to be the older celebrities that write them, I guess because younger celebrities just let rip at one another in 140 characters or less. 

However that is also disappointing. These people are meant to be creative and they’re just doing what everyone else does. Where is the sky writing above someone’s film premiere? Where is the interpretive dance on Oprah’s sofa to show how they feel about twerking while drinking SodaStream? Why don’t they write their thoughts across their naked body and commission a Vogue shoot? It could be so much more interesting and entertaining for all.  

Hey ho. I’ve been feeling slightly angry all week as the extent of my wheat allergy (which I’m in total denial about) starts to make itself known. I’ve done something gluten free this week and gone all out and made it dairy free as well. These do taste ok, and the texture of the biscuit does work, although if you’re ok with dairy then use better instead of the margarine. Sadly when cooking they don’t fill your home with the smell of fresh baking but more like slightly burnt rice. However the caramel filling smells great so that’s a bonus. The original recipe has Xanthan Gum in but as it's powdered mould I left it out. It doesn't lack for want of it.

Ingredients
 
Biscuits
200g dairy-free margarine (or butter)
100g icing sugar
200g ground almonds
200g brown rice flour
1tsp cinnamon
Pinch of salt 

Caramel
150g dairy-free margarine (or butter)
150g light brown soft sugar
A good dollop of golden syrup
OR A tin of Carnation Caramel
 
1.    Cream the margarine and sugar, then add the rest of the biscuit ingredients, mixing well.
2.    Make the dough into a disc, wrap in cling film and put in the fridge for 30 minutes or so.
3.    Preheat the oven, while you wait, to 180°C/GM4.
4.    Next make the caramel as it will need to cool before you use it. Put the sugar and golden syrup on a very low heat and melt together. You’ll need to mix it every now and again as you don’t want it to burn. It will create a paste, rather than liquid, so don’t panic.
5.    Add the margarine (it will spit a bit) and mix until the margarine is incorporated. Then leave on a slow simmer (it will look very bubbly) for 15 minutes. Do not stir. After that time drop some of it into a cup of cold water and check if it’s chewy. If it is it’s done. Leave to cool. Stir a bit as the fat will want to separate out but don’t panic about it.
6.    Once the dough has had its time in the fridge roll out on a surface floured with rice flour. You want it about 4mm thick. Then cut out discs of 4 – 6cm in diameter.
7.    Put on a baking tray, they don’t spread so you don’t have to worry about that, and bake for about 22 minutes (if you have a gas oven then turn half way through for an even colour).
8.    Cool and spread one biscuit with the caramel – there is enough to be generous – and sandwich with another. This makes about 20 in total if you use a 6cm cutter.


Wednesday, 29 January 2014

Oatmeal Sandwich Cookies


I don’t really have anything to waffle on about this week before I let you have the recipe of what I made on Monday. I did think about sharing a list of all the places The Thew and I went on Saturday for one of our quarterly ‘Days of Fun’ but I got worried about how long the list of places was getting and what that may say about the alcohol consumption that went on. Needless to say we drank a lot, ate a lot of cheese and had fun.  

So on to the recipe. I found this on The New York Times’ website and tinkered a bit with quantities as their original recipe would have made something that resembled all that is wrong with US portion sizes. These went down well and were described as a reverse cheesecake. 

Ingredients

Cookies
40g of desiccated coconut
120g butter
165g dark brown sugar
1 large egg
1 tsp vanilla extract
95g plain flour
½ tsp salt
½ tsp baking powder
2 tsp ground cinnamon
130g porridge oats
50g stoned dates, chopped (you could use raisins or sultanas if you prefer)
3 tbsp caster sugar 

Filling
60g cream cheese
3 tbsp mascarpone cheese (I forgot to weigh what this was!)
12g icing sugar
2 tsp vanilla extract 

1.    Heat the oven to 180°/GM4 and spread the coconut on a baking tray. Toast for about 5 minutes (stiring half way through. You want it going golden and smelling great. Once done turn the oven up to 190°C/GM5.
2.    Cream the butter and brown sugar together until light in colour.
3.    Add the eggs and vanilla, mixing well. Worth scraping down the sides of the bowl midway through.
4.    Add the flour, salt, baking powder and 1 tsp of the cinnamon. Beat well and then add the oats, dates, and coconut mixing well again.
5.    This mixture will make 32 cookies so divide the mixture in half, then into four and then each of the four pieces into four. It sounds complicated when written down but it will make sense when you’re doing it. Roll them into balls.
6.     ombine the caster sugar with 1 tsp ground cinnamon and roll the balls in it to cover the outside.
7.    Put them on a baking tray, well-spaced out, flatten very slightly and bake for about 12 minutes (turn half way through if you have a gas oven to give an even colour).
8.    While that is going on put all the filling ingredients in to a bowl (sifting in the icing sugar) and mix well. Once the cookies are cooled use the filling to sandwich two together. I suppose it was about a tsp worth but I just used a knife the spread it on about 5mm thick.

Tuesday, 19 November 2013

Cheese Biscuits


The most amazing chocolate shop has opened near where I work. It used to be a Peyton and Byrne so I was devastated when it changed to a rather weak cafe. I could no longer just grab some fabulous cupcakes as gifts for people. However the rather weak cafe has closed and in its place, intoxicating the air with the aroma of a saucepan full of molten chocolate, is paul.a.young.  

The smell dragged me in and I looked in awe at brownies, slabs of chocolates, delicate confectionary and the owner making chocolate tarts right in front of me. I was slightly interrupted from my blissful musings by a rather loud American going on about how wondrous the chocolate was but forgave her when I realised she had suffered a lifetime of Hershey's. Luckily a perfect excuse to purchase brownies was presented to me by the need to provide cake for a meeting. I saw four different types of brownies so said I'd have one of each. I'd seen that one was salted caramel so that was enough for me. 

When I got to the meeting much excitement ensued and the brownies were cut up to be shared. Then, shock, horror and more excitement - one of the brownies was Marmite flavoured. I hate marmite but it went down well with others which I suppose is the point of Marmite. The leftover pieces were taken into another meeting as a form of Russian roulette so it gave much joy. Now Marmite brownies are a fairly normal thing to dislike. Dislike of bread with cheese in, from a person who likes cheese, is just weird in my eyes. The Thew met today's baking with passionate distaste. Apparently cheese goes on bread - pizza is included in this - but not incorporated as an ingredient into it. Therefore cheese biscuits are wrong according to The Thew. I like it so I baked these, plus I had cheese to use up. These make a great Christmas gift accompanied by cheese and can be made thinner and larger if needed (just cook for less time). I was making them to have on their own so make chunky ones. 

Ingredients
175g strong cheese (I had 100g of blue cheese in the fridge so added 75g of parmesan. Aggressive cheddar would work on its own or mixed with others)
100g unsalted butter, softened (cheese can be salty so you can use salted butter but it could make it too salty)
1 egg yolk
175g plain flour (I used 125g white and then 50g of rye as I like the colour it gives)
1/4 tsp cayenne pepper
1 egg, beaten (optional) 

1.    Grate the cheese if you can or crumble up. Basically you want small pieces.
2.    Mix the butter, cheese and egg yolk together in a big mush.
3.    Add the flour and pepper and combine to create a dampish dough.  Make into a disk, wrap in cling film and leave in the fridge for 30 minutes.
4.    Preheat the oven to 200°C/GM6 and remove the dough from the fridge. If it’s been in for a while then just let it soften a bit as this will make it easier to roll.
5.    Roll out the dough on a floured surface to about 5mm thick and cut out shapes. I used a round 5cm cutter but you can do shapes if you want. Keep re-rolling until all the dough is used up.
6.    Place on a baking tray (they don’t need to be left far apart as they go upwards not across so you can get quite a few on at a time) and glaze with the beaten egg. If you want them matt, not shiny, then leave it off.
7.    Bake for 12-15 minutes (I turn mine half way through to keep the colour even) and then take out and cool. 

Makes about 25-35 depending on cutter size.

Tuesday, 20 August 2013

Millionaire’s Shortbread


There was very little drama this week in the picking of a recipe. I just did what I’d planned to do last week as I remembered to buy the ingredients I needed. This does not help me with a blog post at all. Therefore I’m not going to waffle on and get straight to the recipe. However I’ll use this space to recommend a couple of plays to read that I've read lately. I get that they won’t be everybody’s cup of tea but then what is?
  • August: Osage County by Tracy Letts – excellent play about a family coming together after a death. Lots of different relationships at play, interlinking and exploring what family is. It’s being made into a film so quite excited to see it. 
  • A Doll’s House by Henrik Ibsen (free on Kindle) – I randomly came across this on a link to a reading list F. Scott Fitzgerald had given to someone. It explores a woman’s role in marriage and her identity within it. I didn’t realise until I had read it that it was highly controversial at the time of publishing in 1879. The writer had the belief that "a woman cannot be herself in modern society," since it is "an exclusively male society, with laws made by men and with prosecutors and judges who assess feminine conduct from a masculine standpoint." The thought is still sadly relevant over 100 years after first being published so worth a free download and read.  

Ingredients
55g butter, melted
250g shortbread, smashed (either whizz in a food processor or put in a sturdy sandwich bag and whack it with a rolling pin)
150g soft dark brown sugar
150g butter
1 x tin condensed milk (397g)
200g dark chocolate (you can use milk if you prefer)
1 x packet white chocolate buttons (if you want pretty patterns on the top)

1.    I highly recommend using a silicon baking tray thing if you have one. Mine is 20cm square and you'll need to rest it on a chopping board, as you need a solid base when using silicon baking things. If not line a 20cm square tin (or of similar size), making sure you have plenty of grease proof paper over the edges so you can lift the finished product out.
2.    Mix the biscuit crumb into the melted butter. Once mixed press into the bottom of the tray, even out and let set for an hour.
3.    The caramel takes about 10 minutes to get ready. Put the butter and sugar in a saucepan. Melt and mix together on a low heat. Then add the condensed milk, turn up the heat and stir sluggishly while it comes to a rapid boil. This will take about 3-4 minutes. Once boiling keep stirring vigorously for about 2 minutes. Turn off the heat and stir until it stops bubbling when you stop stirring. I know that doesn't quite make sense but stir a bit, see if it bubbles, stir etc etc. You want to cool it a bit.
4.    Pour the caramel over the set base and then let set for another hour or so. I know this seems like a long time to make something that is a pimped up Twix but most of it is leaving it to set and you can make it over a whole day if you have places to be.
5.    Once the caramel is set melt the chocolate in separate bowls. Pour the dark chocolate on first and spread evenly. If using the white chocolate put dollops of it on top and swirl it using the tip of a sharp knife to make pretty patterns. Let set in the fridge.
6.    Now to cut. If using silicon turn it out on a board and if not lift it out using the paper. Then take a long sharp knife and a kettle of boiled water. Pour hot water over the blade of your knife. Wipe off excess water and then rest the blade where you want to cut. The chocolate will melt allowing you to cut through so it doesn't splinter. Repeat after each slice, cleaning the blade. A bit long winded but it works! Makes about 20-25 depending on how many slices you can be bothered to cut up.

Tuesday, 30 July 2013

Grown Up Cookies (including basic cookie recipe)


Sometimes inspiration strikes in the weirdest places. I found mine this week in a health food shop. I’d sauntered into Holland and Barrett looking for some quinoa flour as I’d seen it in a gluten free recipe. They didn’t have any but I saw some crystallised ginger. Now I’ve never eaten this but one of my friends loves it. In fact ginger is his favourite root. This little gem was gathered when we lived together at university, had clearly run out of conversation and had started on the ‘what’s your favourite …?' game. 

For some reason crystallised ginger has always struck me as a fairly grown up thing to like. Maybe because my friend looks fairly sensible and is now an Accountant. Maybe. Anyway, I picked the packet up and augmented it with a bag of broken brazil nuts (way cheaper than unbroken ones and as I’d probably be chopping them up it made sense). I knew I had chocolate at home but how to bring them all together?!  I was fairly busy at work so hadn’t given it much thought until I struck on one word – ‘COOKIES’! 

So what follows is a basic cookie recipe that you can either use immediately or store in the fridge and cut slices off as and when you need it. Then you just place your extra ingredients on top so that they squish into the cookies while they are in the oven. These cookies have a high butter content so are very crumbly and also tend to spread while baking so leave them space. I think that they are a more grown up type of baked good due to the more advanced flavours of ginger, dark chocolate and nuts. However Smarties, marshmallows and sprinkles would put an end to that.

Ingedients
250g butter (well worth softening it first but otherwise you could grate it to speed up the prep time)
150g granulated sugar
½ tsp vanilla extract (you could add spices for extra flavour)
1 large egg
225g plain flour
1 tsp baking powder
Pinch of salt (if not using salted butter)
Some chopped toppings – I used dark chocolate, brazil nuts and crystallised ginger 

1.    Cream the butter and sugar together until pale. This is very butter heavy I find it might take a bit longer than usual.
2.    Add the vanilla extract and egg, mixing until it’s combined.
3.    Add the flour and baking powder (along with salt if using) and mix until smooth.
4.    Now put the dough on a large piece of cling film and manipulate into a sausage of dough. I’m sure there is a great method for this but I just make sure I have a lot of cling film and a large, flat surface. It gets there somehow. Key is twisting the ends once it’s roughly 7cm in diameter as this helps get a good shape.
5.    Put the dough in the fridge for an hour or so, or pop in the freezer until you need it.
6.    When you are ready to bake them preheat the oven to 200°C/GM6.
7.    Cut 1cm slices from it and arrange them on a baking tray, allowing space for them to spread out.
8.    Sprinkle on your toppings at this stage. You could just have vanilla butter cookies but shoving extra things in is better! Any chocolate would work, also any chopped nuts. Just experiment with whatever you have hanging around.
9.    Bake for 8-10 minutes (I’d go 10 if the mixture was frozen). When done cool for a couple of minutes and transfer to a cooling rack. If you leave too long they’ll stick (although less of an issue if you’re using baking paper).

Tuesday, 9 July 2013

Banoffee Pie


Getting to the Central line is currently like descending into the underworld. You know as you make your way down the escalator that awaiting you is a platform where warm air being pushed out of the tunnel by the oncoming train is a welcome treat, before you cram on to a carriage of humidity and sweat. Someone has either pushed the window at the end up as the strong breeze it creates is bugging only them, or the window is fully open but the world’s tallest and broadest man is standing in front of it so nothing is getting through. Both of these have the same result in creating a desperately unpleasant atmosphere and drastically increasing the chances of someone fainting, disrupting the service and ensuring that everyone stays in the sweat box longer. 

Salvation is at hand though. As you get off the tube and start the gradual ascent to the outside world, oxygen starts to become more readily available creating a euphoric feeling. Notwithstanding the idiots who don’t know how to use the ticket machines properly, you are only seconds away from the actual outside world and, regardless of the heat there, it is nothing compared to the lair of Beelzebub you have recently exited. Sadly repeating this twice daily does somewhat put a dampener on the great weather but at least leads to the temperature outside feeling cool when compared to the horrors of the tube network. 

Hot weather and baking don’t really mix with me. My kitchen is small and manages to heat my flat up, counteracting the strategic window opening and blind positioning. Therefore this week I have made something that requires assembling rather than baking. Banoffee Pie is extremely wonderful and I have made it with a buttery biscuit base but you could make, or buy, a sweet pastry case to construct it in. It’s fairly quick to make and always looks impressive thanks to a sprinkling of chocolate on the top. Transporting in London can be an issue in hot weather and sadly a bag of frozen peas was sacrificed on the Central line to the almighty Hades to ensure the cream didn’t melt. 

Ingredients  
450g digestive biscuits (this is if you want sides, if not then 300g will do)
150g butter (or 100g if using 300g of biscuits)
2 x tins of Carnation Caramel (you could use one but I like a lot of caramel)
3 or 4 ripe bananas
600ml double cream (you could use less and use whipping but just embrace the double cream)
1 x Flake 

1.    Grease a spring form tin. I used a 23 inch one but it just means your pie is deeper if you use a smaller tin.
2.    Smash the digestive biscuits into crumbs by your preferred method. If you have a small child on hand then they can be tasked with this if you’re happy with mess. If not a food processor whizz or bunging into a plastic food bag and smashing to hell and back with a rolling pin will work.
3.    Melt the butter and add to the biscuit crumb. Mix well until it looks like damp sand and put into the tin. Smooth it on the bottom and up the sides with the back of a metal spoon to create your base. Put in the fridge for about 30 minutes. You want to make sure that when you put the caramel on that it doesn’t rip up the base so the butter needs to set.
4.    Take the base out and empty the caramel on it. Spread out until even.
5.    Now do these bits just before you want to eat it as the bananas can go weird. Slice the bananas and scatter the slices over the top of the caramel.
6.    Whip the cream until stiff and smooth over the top of the banana, finishing off with smashed Flake. Once again a small child (or enthusiastic work colleague) can help with this.
7.    If you’ve put sides on the base then use a knife the prise it away from the side of the tin, take the sides of the tin off and serve.

You can of course make this in a tart dish or create individual portions with tea cups or glasses.

Tuesday, 18 June 2013

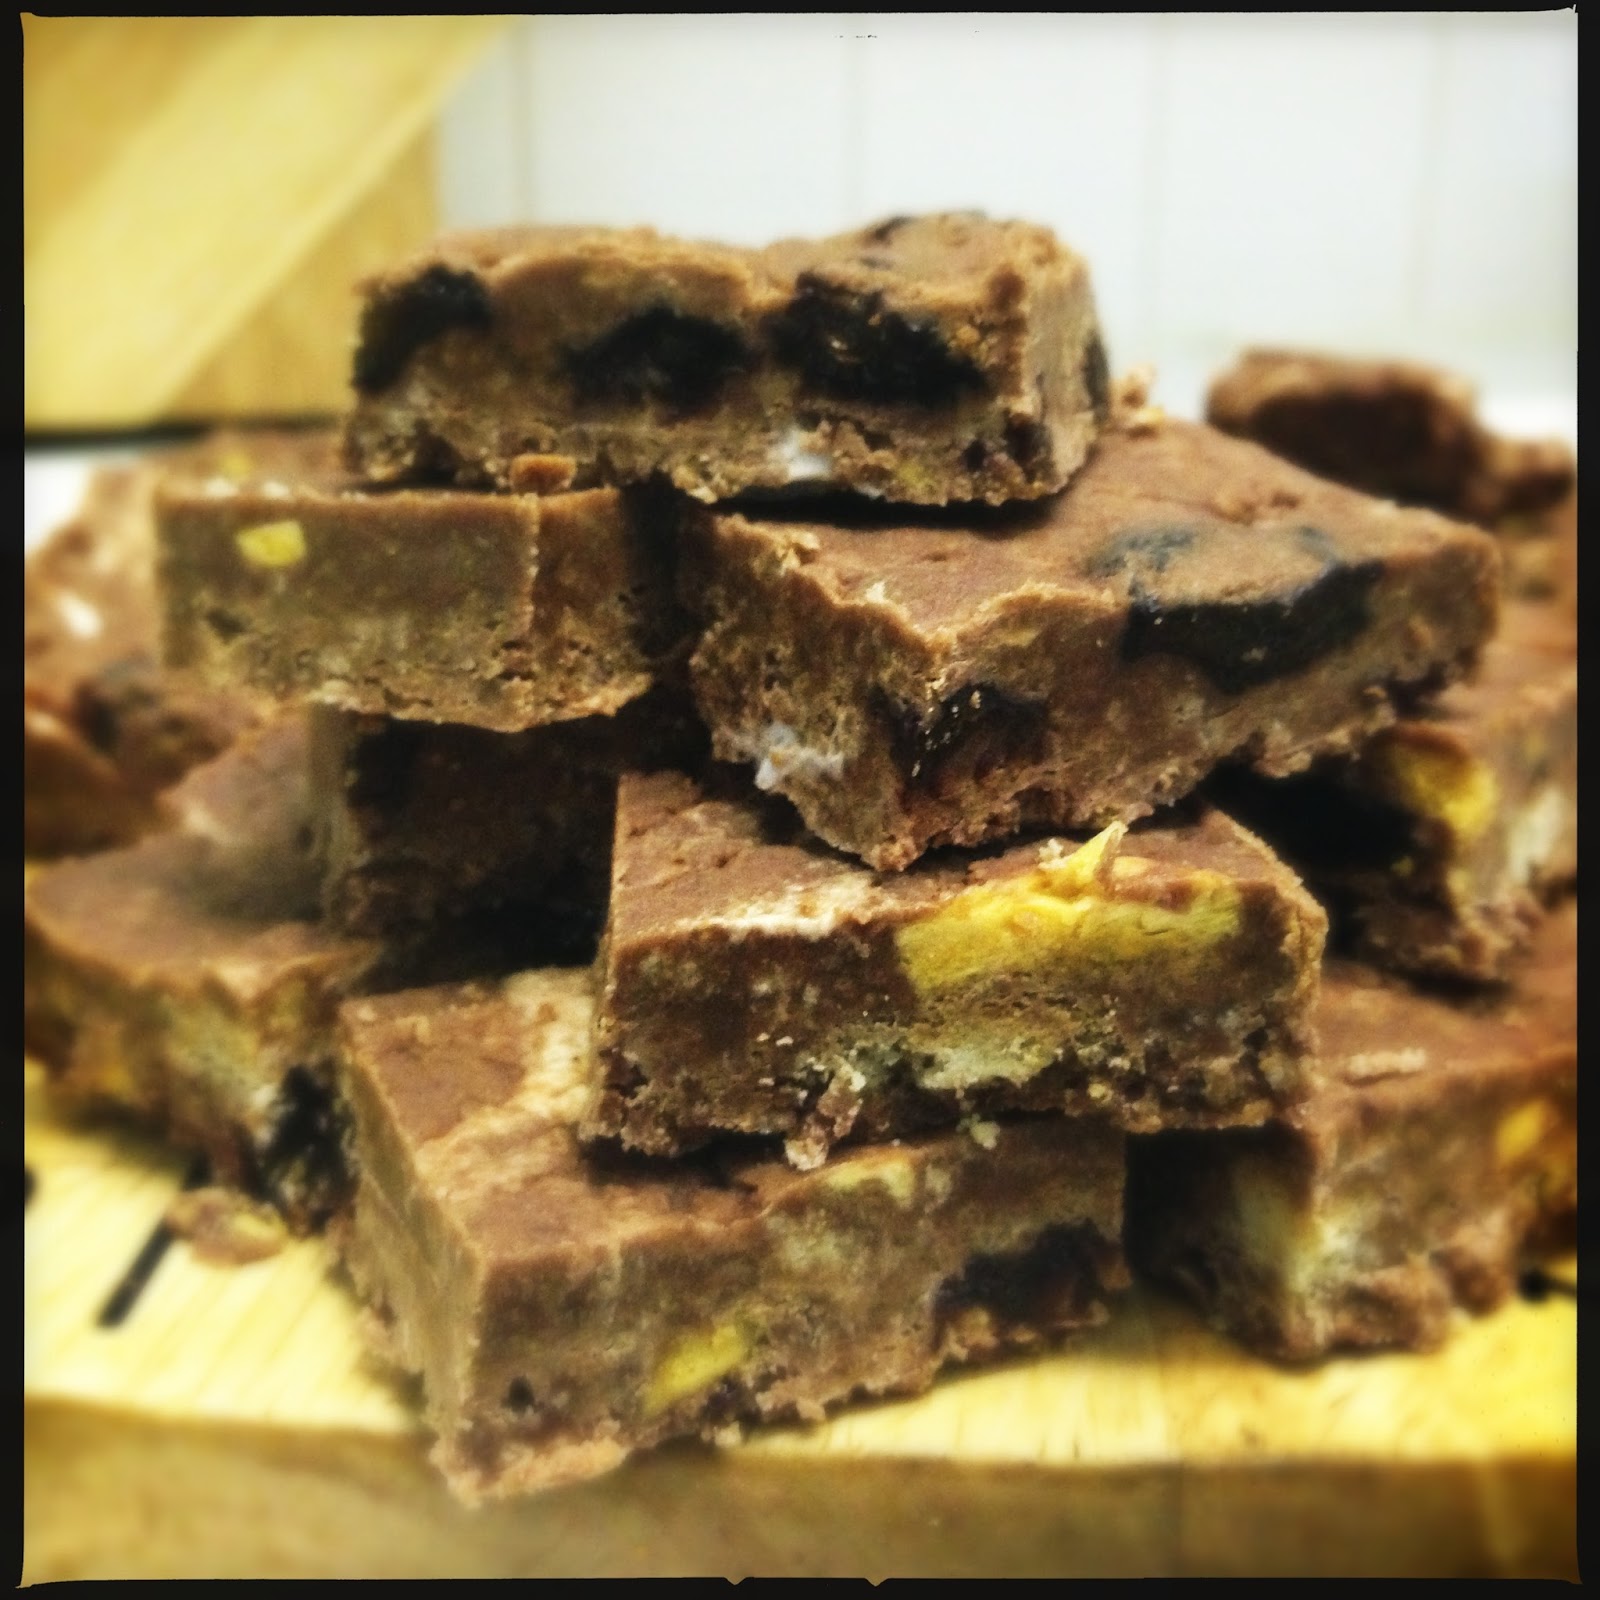
A Very Rocky Road


It all started innocently enough with a bag of marshmallows. On Sunday, during a leisurely walk with The Thew, I pottered around a local deli in the hope of inspiration for something to bake on Monday. I saw a bag of the cutest white mini marshmallows and I instantly wanted them. What to do with them though? I know – Rocky Road. I’ve never made it before but it’s just a lot of lovely things chucked in melted chocolate, how hard can that be?
Apparently, quite hard. (At this point I must point out that the marshmallow packet had a picture of the clown on it which everyone knows are scary, evil things. I shouldn’t have ignored my original revulsion at his stupid smiling face; I should have known things would go wrong). I had what can only be described as a melting chocolate catastrophe. It’s still too painful to talk about much but my chocolate glooped together rather than running smooth. I’m blaming the addition of golden syrup at the melting stage. Although I’ve done that before. To be honest I have no idea why it clumped together and stopped melting properly but it did. There is probably some scientific explanation, especially as this was milk chocolate, but I’m now determined to get a house with a kitchen big enough for a microwave for the sole purpose of melting chocolate. I’ve been burned by the bowl over the hob method and it’s going to take me a while to recover! 
I decided to continue, as I had smashed everything else up, ignoring the fact that mixing things together would be hard when the chocolate was a massive ball of non-meltedness. I put it all into my silicon baking mould and put it in the oven to allow the marshmallows to melt a bit and help bind it together. It kind of worked and to be honest I was so annoyed I shoved the whole thing in the fridge until I cut it up this morning. It's ok. Poeple at my work will eat it. 
So there you have it. The drama that baking (or melting) can contain.
Ingredients
300g milk chocolate
5 digestive biscuits
½ bag of those chocolate covered honeycomb pieces from M&S or two Crunchies
50g raisins
Big handful of mini-marshmallows
3 tbsp golden syrup

1.    Melt the chocolate however you normally do. Good luck!
2.    Smash up the biscuits and Crunchies, if using those rather than pieces.
3.    Add biscuits, honeycomb, raisins and marshmallows to the chocolate and mix. Then drizzle the golden syrup on top, if using, and mix in.
4.    Place in a well lined tray (or a silicon one that doesn’t need lining - mine was 8” by 8”), smooth out and chill for about 2 hours. Lift out and then cut into chunks.
5.    Avoid clowns.


 See? Scary clown!