Tuesday, 18 June 2013

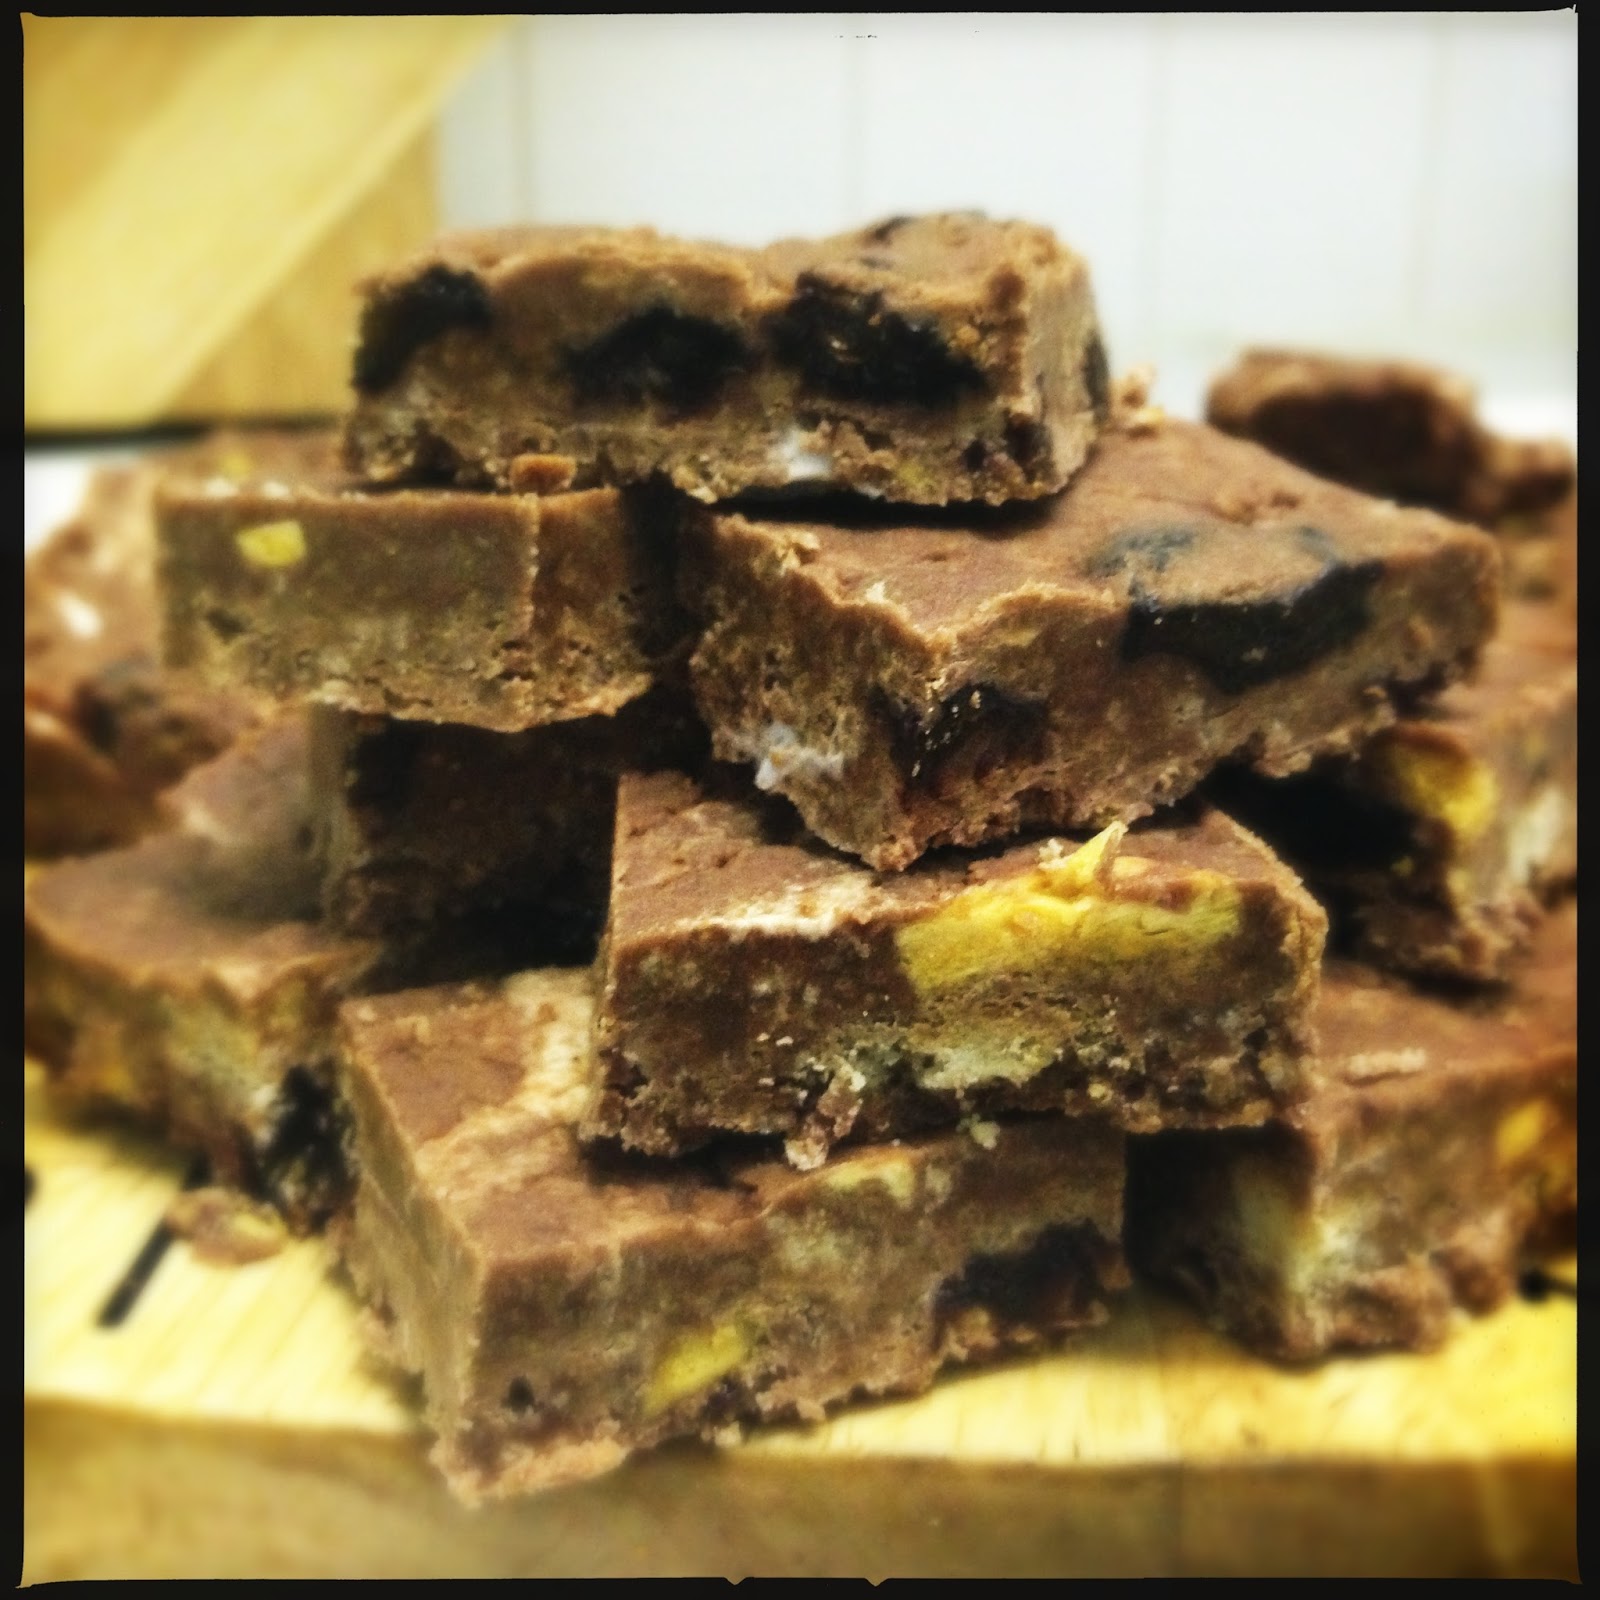
A Very Rocky Road


It all started innocently enough with a bag of marshmallows. On Sunday, during a leisurely walk with The Thew, I pottered around a local deli in the hope of inspiration for something to bake on Monday. I saw a bag of the cutest white mini marshmallows and I instantly wanted them. What to do with them though? I know – Rocky Road. I’ve never made it before but it’s just a lot of lovely things chucked in melted chocolate, how hard can that be?
Apparently, quite hard. (At this point I must point out that the marshmallow packet had a picture of the clown on it which everyone knows are scary, evil things. I shouldn’t have ignored my original revulsion at his stupid smiling face; I should have known things would go wrong). I had what can only be described as a melting chocolate catastrophe. It’s still too painful to talk about much but my chocolate glooped together rather than running smooth. I’m blaming the addition of golden syrup at the melting stage. Although I’ve done that before. To be honest I have no idea why it clumped together and stopped melting properly but it did. There is probably some scientific explanation, especially as this was milk chocolate, but I’m now determined to get a house with a kitchen big enough for a microwave for the sole purpose of melting chocolate. I’ve been burned by the bowl over the hob method and it’s going to take me a while to recover! 
I decided to continue, as I had smashed everything else up, ignoring the fact that mixing things together would be hard when the chocolate was a massive ball of non-meltedness. I put it all into my silicon baking mould and put it in the oven to allow the marshmallows to melt a bit and help bind it together. It kind of worked and to be honest I was so annoyed I shoved the whole thing in the fridge until I cut it up this morning. It's ok. Poeple at my work will eat it. 
So there you have it. The drama that baking (or melting) can contain.
Ingredients
300g milk chocolate
5 digestive biscuits
½ bag of those chocolate covered honeycomb pieces from M&S or two Crunchies
50g raisins
Big handful of mini-marshmallows
3 tbsp golden syrup

1.    Melt the chocolate however you normally do. Good luck!
2.    Smash up the biscuits and Crunchies, if using those rather than pieces.
3.    Add biscuits, honeycomb, raisins and marshmallows to the chocolate and mix. Then drizzle the golden syrup on top, if using, and mix in.
4.    Place in a well lined tray (or a silicon one that doesn’t need lining - mine was 8” by 8”), smooth out and chill for about 2 hours. Lift out and then cut into chunks.
5.    Avoid clowns.


 See? Scary clown!

Wednesday, 12 June 2013

Rhubarb and Custard Tart


I won the lottery! Four numbers between four of us. Not quite the big time but heading in the right direction. My good friend Rachel has been managing our little syndicate for years now and every now and again some money will enter my account when we have a bit of cash to pay out. I have to do nothing, as my direct debit for my lines goes over automatically, so it make the small amounts feel like a little treat. Normally I do nothing about it but this time I thought I should get something with the money as I fancied treating myself. But what to get? Most of the shops a short distance from my work sell electronics or home ware. Therefore home ware was going to be the theme.  
This happily coincided with my thinking about what to bake this week. I bought some rhubarb last week but wasn’t feeling the whole rhubarbness so made caramel cupcakes. However it’s still in my fridge and pretty much begging me to do something with it. I love rhubarb and there were always a few plants at the end of the garden while growing up so it was used liberally. I don’t think it’s used enough as its slight tartness is welcome, even if you have to slather it in sugar to make it palatable. Surely that’s a plus? So I thought ‘rhubarb’, then I thought ‘custard’, but I don’t want a crumble – what about a tart?!!! 
So below is the culmination of my thought process, matched with winning the lottery and deciding to treat myself to a loose bottomed flan tin. My case split, and half the custard drained out while baking, but it rocked. I used a 25cm tin but you could use one slightly smaller, although I had custart left. It’s a really simple recipe and I’d say that you could use the custard as a base for any fruit tart that you like. Soft fruit would work well and I wouldn’t bother with roasting first. 
Ingredients
400g rhubarb
100g caster sugar
A vanilla pod if you have it but I chucked in some extract
350g short crust pastry (I used the ready roll but it just broke apart. I think the readymade block would be better and just roll it out yourself or buy a readymade tart case!)
75g soft butter
150g caster sugar
300ml double cream
3 large eggs
1/2 tsp vanilla extract 

1.    Preheat the oven to GM5/190°C.
2.    Chop up the rhubarb into chunks. About 3 - 4cm long and if it’s chunky cut in half lengthways. Cover with the caster sugar, drizzle on the vanilla extract, cover with foil and put in the oven for 15 minutes until soft. (Mine went completely mushy but it worked). Then leave it covered until you need it.
3.    If baking your case then roll out the pastry and line a buttered flan tin with it. Ideally loose bottomed but if you don’t mind prising the first bit out in a messy way then any tart style tin will do. Blind bake (so a large piece of baking paper down, cover with a load of lentils chucked on top to stop the pastry rising. Some people have specialist baking beads but screw that – lentils do) for 15 minutes then lift the baking paper out, with the lentils, and bake for about 7 minutes until the case is hard and starting to colour.
4.    If not baking your case, and you’ve bought one, then skip step 3 and feel smug.
5.    Turn the oven down to GM3/160°C. Put the soft butter (make sure it’s really soft), sugar, cream, eggs and vanilla in a bowl and whisk together. Custard done! See so simple.
6.     Drain the rhubarb, keeping the liquid as you could serve with some of this and cream. Fill half the case with custard, dot the fruit around, then fill the case with the rest of the custard. If you feel like it save some fruit to lay on top to look impressive. I didn’t do this!
7.    Bake for 35 minutes with a baking tray on the bottom of the oven to catch any stray custard.
8.    Fully cool before serving. 

N.B. You will have some pastry and possibly some custard left. So cut out rounds of the pastry, line a cup cake tin with them, adding the custard. Bake for 15 minutes and cool.


Tuesday, 4 June 2013

Caramel Cupcakes


I've needed to get my fringe cut for about two weeks now and have been unable to find the time. I have no idea why not as it’s a relatively simple procedure and doesn't take long but I just haven't found the time. Now I'm rapidly running out if hair styles which allow my fringe to be pulled back. If I leave it down then it goes to the side and just looks stupid. I may have attempted to trim it myself at the weekend but after the first tiny snip I realised that only madness lay in in that approach and put down the scissors. 

Currently I'm attempting to rock a high bun/top knot thing which saves me tons of time. Just whack damp hair into a high ponytail and swish up with a hair band into something looking relatively neat. If only everything in life was that easy. Although I always panic that tying wet hair up will somehow cause it to rot as it can't fully dry as I'm sure I heard that somewhere (I did Google it and apparently people with thick hair who put it in a ponytail wet and leave it for days can get mildew! Who leaves their hair in a ponytail for days on end?) 

Anyway I can't find time to get my fringe trim but I do find time to bake. I had started prep by taking the butter out if the fridge on Sunday and I urge you to do the same. Normally I just soften butter with the electric whisk but this recipe is so much easier if it’s squishy to begin with. This is a Hummingbird Bakery recipe with my own tweaks to their frosting (mainly halving it as they get you to make so much). Their base for cupcakes is so simple and the addition of milk makes then verge on muffin texture while keeping something fundamentally cupcake there. My sister made these for our Mother's Day afternoon tea this year and they were amazing.

Ingredients 

Cupcakes
80g softened butter
280g sugar
240g plain flour
1 tbsp baking powder
1/4 tsp salt
240ml whole milk (don't scrimp with semi-skimmed - look how much sugar you're putting in)
2 large eggs
1/2 tsp vanilla extract
150g caramel (Carnation have finally cottoned in to the fact that it’s fairly dreary boiling a can of condensed milk for 2 hours just to get caramel and now do the boring work for you)

Frosting
80g softened butter
250g sifted icing sugar
50ml whole milk
80g caramel 

1.    Preheat the oven to 190°C/GM 5. Fill two 12 muffin/cupcake tins with cases. The original recipe says this makes 12-16 cupcakes in a muffin tin but I can get about 24 out if you use large cupcake cases.
2.    Put the butter, sugar, flour, baking powder and salt in a bowl and using an electric whisk mix together until it looks like breadcrumbs.
3.    In a jug hand whisk the milk, eggs and vanilla. Add about ¾ of this to the cupcake mixture and mix well. Then add the rest with the caramel. Mix until smooth and then divde the mixture in to the tins. Fill the cases about 2/3’s full (I always end up with a bit more in each).
4.    Bake for about 20 minutes until a cake tester comes out clean. I have a gas oven to turn the tin around half way through as otherwise the ones nearest the back get more browned than the ones at the front.
5.    While this is going on make the frosting. Mix the butter and sugar together. It will form lumps of butter and sugar, so don’t panic – you don’t want to cream them. Then add the milk, mix well, and then the caramel. Done.
6.    Once the cupcakes have cooled slather the top in frosting. I use a palette knife and hope for the best as I’m not skilled with anything delicate.

Wednesday, 29 May 2013

Spiced Biscuits


I spent the Bank Holiday weekend with a cold. I had managed to get out and about a bit on Saturday as I'd spent Friday off work pathetically lying on my sofa watching my box set of Arrested Development. However Sunday and Monday meant a return to the sanctity of my sofa with a couple of ventures outside to gain some sustenance. The Thew was off trekking around the coast of west Wales so I had no one to tend to me. It was only thanks to a tin of tomato soup I found at the back of my cupboard and Deliverance that I even made it through Friday. 

I'd planned a wonderful baking extravaganza on Bank Holiday Monday as I would have lots of time. I was going to make a New York Cheesecake and then tackle my demons by attempting to ice cupcakes with fondant icing. Best laid plans and all that came down to bear on me. I managed to make cupcakes but after attempting to roll out icing while watching Romancing the Stone I gave up. 

I decided that what I needed was a nice cup of tea and a biscuit. Nothing too exciting as I had to work with what was in the house but a simple satisfying biscuit. So I hunted through some recipe books and discovered a recipe for 'Simple Biscuits'. I added some spice and was proud to have created something just right. These can be made quickly and even if you have cold you can triumph over something, feeling a little bit better for a while. 

Ingredients 

175g plain flour
1/4 rounded tsp grated nutmeg
1/4 rounded tsp ground mixed spice
1/4 rounded tsp ground cinnamon
1/4 tsp ground cardamom (this is a compete bugger to find but it amazing so snap it up if you see it. Leave out if you don't have any)
115g butter
50g caster sugar 

1.    Preheat oven to 180°C/GM 4.
2.    Put flour and spices in a bowl and mix together.
3.    Add the butter, cut into cubes/chunks, and rub in until you get something that looks like breadcrumbs.
4.    Add the sugar and then strongly suggest to all the ingredients they want to form a dough. You'll need to squish everything together forcibly.
5.    Then lightly flour a surface and roll the dough out until about 5mm thick. It might break a bit but just mush the edges back together. Cut out biscuits to the size you want. I used a 6cm cutter but you could go bigger. These are a little fragile when cooked so don't go too big.
6.    Bake on a non-stick tray for 10 minutes. They'll be pale when they come out and let them cool slightly, but not too long so a couple of minutes, before transferring to a cooling rack. Cool compete as these are one of those rare baked goods that taste better cold than fresh out of the oven.
7.    Make a cup of tea, grab some biscuits, pop on the second disc of the third series of Arrested Development, crawl under your duvet on the sofa and await someone's arrival who can tend to you.

Friday, 17 May 2013

Chelsea Buns or Why I Can't be Bothered


Oh I can’t be bothered. It’s been that kind of week really. Everything has been an effort and a pain. I think part of it was that I was sort of ill for a few days. Nothing bad enough for me to stay in bed and watch my box set of Mad Men but enough to make everything a chore. I’ve also pulled something in my leg and am having to actively try and fix it in time for my 10km run on Saturday (tomorrow). What feels like hours of rolling on a roller and tennis ball haven’t helped my general feelings of botheredness.  
However the weekend is upon me and I’m very much looking forward to it (apart from the 10km run). I’ll be making cake pops for my wondrous and beautiful Goddaughter’s 7th birthday and then, pampering her and some of her friends alongside her Godmother of Fabulousness (she has two the lucky thing!) There are going to be four of us acting as beauticians and it’s going to be lots of fun.
So in the general theme of this week I can’t be bothered to write up the recipe for these Chelsea Buns. I wasn’t 100% happy and it all seems like too much of a chore. I’m going trashy next week which I think will be more exciting.


Tuesday, 7 May 2013

Finnish Rye Bread


Bank holiday weekends are just great. Especially when the weather is so good. The Thew and I took advantage by eating and drinking our way around London for two days. We met up with friends on Saturday and then on Sunday we went on some epic walkabout stopping off for food and wine. It’s what we do best and it was nice that my husband didn’t have to run a couple of marathons just as part of his training. Although some hill running is about to commence to get him ready for his next challenge. 

Anyway Monday was all about recovering and we just pootled around our local parks. I really couldn’t be bothered with baking anything that would take too much time. I had planned to do something intricate, because the weather on a Bank Holiday Monday is normally pants and I’m happy to be in my kitchen, but the sun came out and all plans went on hold. 

So it might seem weird that I'd make bread for something quick and easy but it really is. This recipe is a Nigella one from the Domestic Goddess who can always be relied on for something that isn’t a faff. After an impromptu picnic in Victoria Park The Thew and I headed home to sit in the small park behind our block of flats. I spent five minutes getting the dough ready to rise, popped it in the airing cupboard to prove and after a couple of hours sitting in the sun the dough was ready for the second proving before popping in the oven. Barely any work at all.  

Ingredients 

225g rye flour
300g strong white flour
7g (1 sachet) easy blend yeast
1 tbsp dark muscovado sugar (I only had light but it seems to work)
2 tsp salt
300ml warm flour
45g melted butter 

1.    Put the flours, yeast, sugar and salt into a bowl and mix. Add the warm water slowly and bring together. You're going to need to get your hand into the mixture as a wooden spoon just doesn't cut it.
2.    Once it’s come together add a tbsp of the melted butter and mix in. Then get kneading. Dough hooks are clearly recommended here but by all means do it manually. There is something about having dough in your fingernails that makes it feel like you’ve achieved something.
3.    Use some of the melted butter, about a tbsp, to oil a bowl and the top of the dough. Cover the bowl, leave somewhere warm for a couple of hours to double in size (or in the fridge overnight) and go outside to sit in the sun.
4.    Once doubled in size punch the dough down (is there anything more gratifying in baking), knead a bit and then shape into a round loaf and place on a baking tray. Leave somewhere warm for about 30 minutes and preheat the oven to 190°C/GM 5.
5.    Then pop in the oven for about 45 minutes (to check if it’s done tap the bottom and it should sound hollow). Then when you take it out brush the top with the remaining melted butter to give a chewy crust.

Wednesday, 1 May 2013

Banana Bread with Chocolate Chunks


Now this recipe was inspired by having four very ripe bananas at home the The Thew never got around to eating. I didn’t have any rum or bourbon to make my usual version so thought I’d kind of make it up as I went along. It came out well and got demolished at work. It’s very dense but I believe all good banana bread it. One of my work colleagues took up my suggestion to see what happened when you toasted it and spread it with butter. It worked well. I’d avoid the toaster though and fry or griddle in butter for an immense dessert. 

Ingredients 

100g butter
4 ripe bananas (about 350-400g with the skin off)
200g soft brown sugar (I had light but dark would work)
2 large eggs
1 tsp vanilla extract (as I type this I realise I forgot to put it in!)
1 tsp bicarb of soda
1 pinch of salt
175g self-raising flour
Chunks of chocolate (optional) 

1.    Preheat the oven to 170°C/GM 3. Line a loaf tin. I get the ones from Lakeland that come in the right shape already as it saves so much time.
2.    Melt the butter in a largish saucepan and add the bananas. I break them in and then smash them up with an electric whisk.
3.    Add the sugar, eggs, vanilla, bicarb and salt. Whisk again. Then add the flour and mix well.
4.    Pour into the lined tin and just put the chocolate on top. You can push it in if you like, use more than one type of chocolate – whatever you fancy. Bake for about 1 – ½ hours. Test after an hour and see what it’s like.